


A Clinician's Guide to Implant Screw Removal ("Implantat Schraube Entfernen")
A patient presents with a mobile crown, and the immediate suspicion is the abutment screw. A loose or fractured screw is a common complication in restorative dentistry that can escalate a routine appointment into a complex clinical challenge.
Successful management is not merely about screw removal. It requires a systematic, evidence-based approach to retrieve the screw or its fragments without causing iatrogenic damage to the implant. The primary clinical objective is to preserve the integrity of the implant's internal threads, ensuring its long-term viability.
The Challenge of a Compromised Implant Screw

A compromised implant screw immediately jeopardizes the success of a restoration. The clinical presentation can range from a slightly mobile crown to a complete fracture deep within the implant fixture. Both scenarios demand immediate and meticulous intervention.
This is more than a simple mechanical failure. A loose screw permits micromovement at the implant-abutment interface, which can lead to patient discomfort, peri-implant inflammation, or catastrophic damage to the prosthesis. A fractured screw completely obstructs the access channel, rendering restoration impossible until the fragment is successfully retrieved.
Understanding the Root Causes
Before selecting an instrument, a thorough diagnosis of the failure's etiology is essential. Identifying the root cause is the first step toward a predictable and lasting solution.
Several factors contribute to screw-related complications:
- Inadequate Preload: Insufficient initial torque application fails to achieve the necessary clamping force to withstand occlusal loads, predisposing the screw to loosening.
- Occlusal Overload: Heavy eccentric contacts or parafunctional habits can generate excessive biomechanical forces, leading to material fatigue and eventual fracture.
- Component Misfit: Ill-fitting prosthetic components, often resulting from laboratory or casting inaccuracies, create stress concentrations that can precipitate failure.
- Material Fatigue: Cyclical loading over time can degrade the screw's mechanical properties, particularly if it has been previously loosened and retightened.
A systematic, evidence-based approach is non-negotiable for preserving implant integrity. The objective is not just to remove the screw but to diagnose the reason for its failure, ensuring the new restoration's long-term success.
To assist in clinical triage, the following table outlines common signs and symptoms.
Clinical Indicators of Common Implant Screw Complications
| Complication | Clinical Sign | Patient Complaint | Recommended Action |
|---|---|---|---|
| Screw Loosening | Mobile prosthesis, visible gap at margin, slight gingival inflammation. | "My crown feels loose," "It clicks when I chew." | Immediate intervention. Remove prosthesis, clean components, inspect threads, replace screw, and torque to manufacturer's specification. Check occlusion. |
| Screw Fracture | Abutment/crown is loose or has come off, but a fragment remains in the implant. | "My tooth fell out, but the post is still in my gum." | Urgent. Requires specialised retrieval kit. Do not attempt to drill without proper training/tools. Radiograph is essential. |
| Stripped Screw Head | Screwdriver spins without engaging the screw head. | "My dentist couldn't get the crown off." | Non-urgent if prosthesis is stable. Requires specific retrieval tools or techniques to gain purchase on the damaged head. |
| Occlusal Overload | Chipped porcelain, worn contacts, fremitus on the implant crown. | Frequent loosening, soreness, or feeling that the "bite is off." | Occlusal adjustment is critical. If screw has loosened, replace and re-torque. Consider a night guard for bruxism. |
This table serves as a starting point. Clinical findings must be confirmed with a thorough examination and radiographic imaging before initiating treatment.
Prevalence in Clinical Practice
Abutment screw complications are a well-documented challenge in implantology. Studies on implant-supported single crowns report screw loosening rates of 12.7% after a 5-year follow-up. Within the first year alone, 4.3% to 10% of implants may experience screw loosening. Read the full research about these clinical findings for a deeper analysis.
These statistics underscore the importance of mastering retrieval techniques and, more critically, focusing on prevention. Understanding biomechanics and adhering to precise clinical protocols—such as using a robust system like the ARC™ Conical Implant—can significantly reduce the incidence of these complications. For further reading on implant stability, explore our article on the parameters determining micromotion.
Essential Diagnostics Before Attempting Removal

Before initiating an "implantat schraube entfernen" procedure, a meticulous diagnostic workup is non-negotiable. Rushing this stage can convert a recoverable situation into one that necessitates implant removal. A successful outcome is predicated on a comprehensive understanding of the clinical situation before any intervention.
The process begins with a comprehensive clinical examination. The restoration's mobility should be assessed gently with two instruments to determine if the abutment is mobile with the crown or if the prosthesis is rocking independently. This initial check provides clues as to whether the issue is a loose screw, cement failure, or a component fracture.
The Clinical Examination
A thorough occlusal analysis is paramount. Heavy wear facets, fremitus, or polished spots on the restoration indicate occlusal overload, a common root cause of screw complications. The patient should be questioned about parafunctional habits such as bruxism or clenching, which can push prosthetic components beyond their mechanical limits.
Concurrently, the peri-implant soft tissues must be evaluated for signs of inflammation. Erythema, edema, or exudate upon gentle probing are red flags for micro-gaps at the implant-abutment interface, which can lead to peri-mucositis or peri-implantitis.
The primary objective of the pre-operative assessment is to construct a complete clinical picture. This involves identifying not only the mechanical failure but also the biomechanical forces that precipitated it. Failure to do so risks recurrence in the subsequent restoration.
The Critical Role of Radiographic Imaging
High-quality radiographs are the cornerstone of the diagnostic process. Periapical and vertical bitewing radiographs are essential for visualizing the implant-abutment connection with minimal distortion, providing the critical information needed for predictable treatment planning.
Radiographic analysis should focus on:
- Screw Integrity: Is the screw intact, backed out, or fractured? A clear radiolucent line between the screw head and the abutment seat is a classic sign of loosening.
- Fracture Location: If fractured, is the fragment visible above the implant platform or is it located deep within the implant's internal threads? The depth of the fragment dictates the complexity of the retrieval.
- Thread Condition: The implant's internal threads must be closely examined for any signs of stripping or damage, which could alter the treatment approach.
- Component Seating: Confirm that the abutment is fully seated on the implant platform. An improperly seated component is a frequent cause of screw loosening and subsequent fracture.
In complex cases, such as deep fractures or suspected implant damage, Cone Beam Computed Tomography (CBCT) can provide invaluable three-dimensional insight. A CBCT scan allows for precise mapping of the screw fragment's position relative to the implant body. This advanced imaging can be the deciding factor between attempting retrieval and referring to a specialist. To learn more about this technology, review our guide on the professional application of digital volume tomography.
Building Your Screw Removal Toolkit
For a compromised implant screw, having the correct instrumentation is critical. A well-organized armamentarium facilitates an efficient and less stressful procedure for both the clinician and the patient. Success in an implantat schraube entfernen procedure often depends as much on preparation as it does on technique.
Your instrumentation should be organized in tiers, beginning with the essentials for common, straightforward cases.
Core Instruments for Basic Retrieval
For a simple loosened screw, the objective is to re-engage the screw head and apply counter-torque without causing damage.
- Precision Screwdrivers: A complete set of high-quality drivers matching the specific implant systems used in your practice is non-negotiable. A worn or incorrect driver is a primary cause of stripped screw heads.
- Dental Explorer: A sharp explorer is indispensable for clearing debris, cement, or composite from the screw access channel to ensure proper driver seating.
- Magnification and Lighting: Adequate visualization is critical. Loupes or a dental microscope are essential for assessing the condition of the screw head and surrounding threads.
A well-maintained and properly sterilised set of instruments reflects the standard of care in a clinical practice. For a review of best practices, our guide on the proper sterilisation of dental instruments outlines essential protocols.
While these core tools are sufficient for most screw-loosening scenarios, screw fractures demand specialized equipment.
Specialised Kits for Fractured Screws
When a screw fractures, particularly below the implant platform, standard drivers are ineffective. Dedicated screw retrieval kits are engineered to remove the fragment without damaging the implant's delicate internal threads—the preservation of which is the top priority.
The Alfa Gate Screw Remover Kit is an example of a comprehensive system designed for these high-stakes scenarios. It provides a systematic workflow with the correct tool for each step of the retrieval process.
A high-quality retrieval kit typically includes:
- Guide Sleeves: These precision-milled cylinders fit into the implant's connection to centre all subsequent instruments, acting as a guard to protect the internal threads from damage.
- Reverse-Threaded Removers: These are the primary retrieval instruments. Their tapered, left-handed threads are designed to engage the top of the fractured screw. As the remover is turned counter-clockwise, it locks onto the fragment and unscrews it.
- Taps and Drills: In some cases, a small pilot divot must be created on the fragment's surface to allow the remover to gain purchase. These are used with extreme caution and always through a guide sleeve.
The Role of Ultrasonics
An ultrasonic scaler with a specialized tip can be an invaluable adjunct for vibrating a stubborn fragment loose. Gentle, intermittent vibration applied to the screw piece can break the friction lock or dislodge binding debris. Care must be taken to avoid heat generation that could impact the surrounding bone.
A complete toolkit prepares the clinician for nearly any screw-related complication, converting a potential crisis into a manageable clinical task.
Techniques for Removing Loosened and Fractured Screws
Managing a compromised implant screw requires patience, precision, and the correct instrumentation. The approach to an "implantat schraube entfernen" procedure is dictated by the clinical situation—a loose screw presents a different challenge than a fragment sheared off deep within the implant. The primary objective is always the preservation of the implant's internal threads.
Success rates for these procedures can vary. Some research suggests a five-minute time limit before a screw might be considered unretrievable. The location of a fracture significantly alters the prognosis; a fragment coronal to the implant platform may be retrievable with standard instruments, whereas a subcrestal fragment requires a dedicated kit. To learn more, you can review the research behind screw retrieval techniques.
Managing a Simple Loosened Screw
A loosened screw is the most common and typically the most straightforward complication to resolve. After removing the prosthesis, the screw access channel must be meticulously cleaned of all cement and debris with a sharp explorer to ensure proper driver engagement and prevent stripping.
Using a high-quality, correctly matched driver, apply firm but gentle apical pressure while turning steadily counter-clockwise. If the screw spins without backing out, packing a small cotton pellet or a piece of PTFE tape into the screw head can create the necessary friction to engage the threads.
Retrieving a Stripped Screw Head
A stripped head signifies a loss of purchase. The goal then shifts to creating a new purchase point or using friction to break the screw loose. A round bur on slow speed can be used to carefully create a small divot in the screw head's center, providing a new purchase point for a smaller instrument or a specialized removal tool.
Alternatively, an ultrasonic scaler with a fine tip can apply controlled vibrations to the screw head's periphery, which can often break the friction lock and allow the screw to be backed out with an explorer.
Tackling a Fractured Screw
A fractured screw presents a significant clinical challenge. The retrieval strategy depends entirely on the fracture's location.
-
Fracture Above the Implant Platform: If a portion of the screw fragment is visible, it may be retrievable with fine-tipped haemostats or a sharp scaler. A secure grip and gentle counter-clockwise rotation are required, always under high magnification.
-
Fracture Below the Implant Platform: When the fragment is flush with or deep inside the implant, a dedicated screw removal kit is non-negotiable.
The required instrumentation escalates with the complexity of the problem.
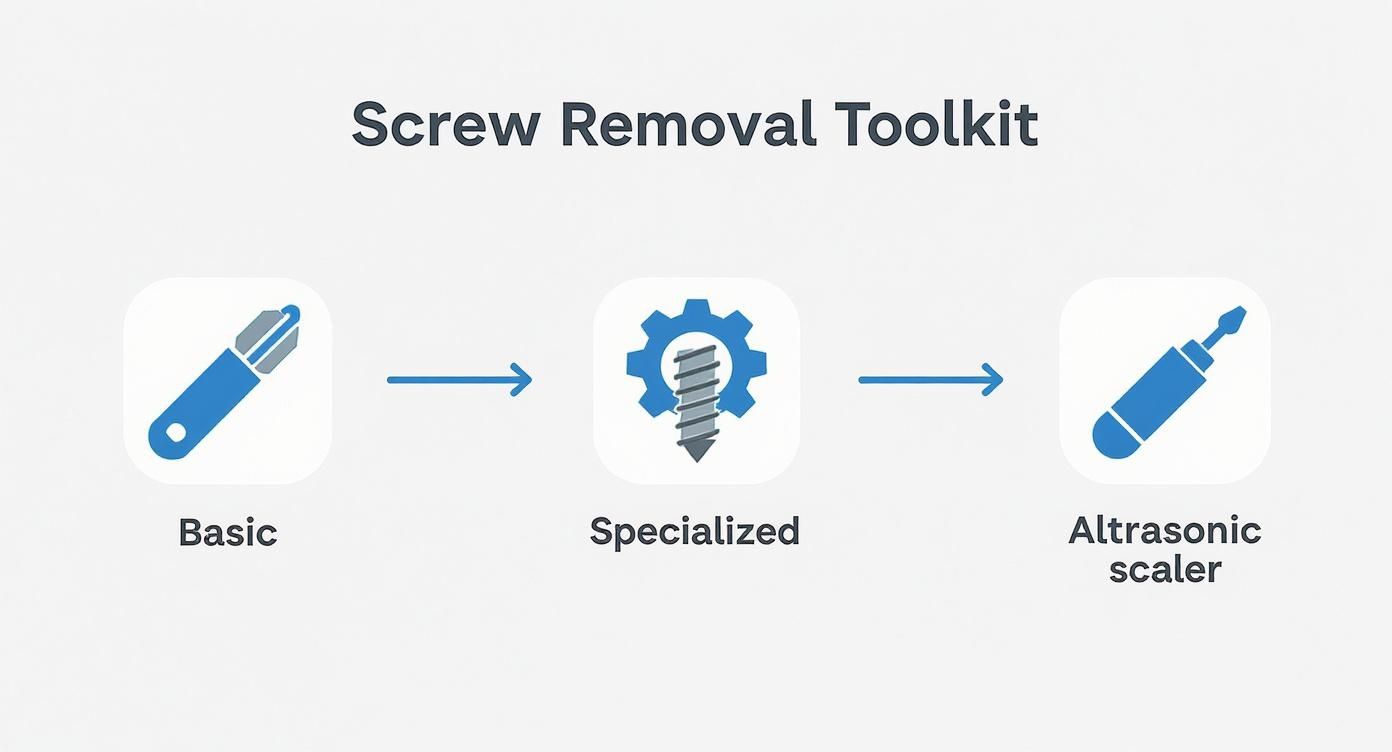
This illustrates the progression from basic hand instruments for simple cases to specialized kits and ultrasonic tools for more complex retrievals.
The Systematic Use of Removal Kits
Using a removal kit is a precision, step-by-step process that must be followed methodically to avoid iatrogenic damage.
First, select the guide sleeve that perfectly matches the implant's internal connection. This guide centers all subsequent instruments and physically shields the implant's internal threads.
Next, a small, center-cutting drill is used through the guide to create a pilot divot on the fractured screw's surface. This step requires an extremely light touch and copious irrigation to mitigate heat.
Finally, the reverse-threaded remover is inserted through the same guide. As it is turned counter-clockwise with a hand wrench, its specialized threads engage the pilot divot, locking onto the fragment. Continued slow, steady pressure will back the fractured piece out of the implant.
The cardinal rule in screw removal is patience. Rushing the procedure or applying excessive force is the fastest way to damage internal threads, potentially leading to the loss of the entire implant. Meticulous technique under high magnification is non-negotiable.
This structured approach, supported by a well-designed kit, can transform a potential disaster into a predictable, successful procedure.
Proactive Strategies for Preventing Screw Complications
While proficiency in screw retrieval is a valuable clinical skill, the ideal scenario is to prevent these complications from occurring. A proactive approach focused on sound biomechanical principles is the key to long-term restorative success.
This involves three core principles: achieving correct preload, managing occlusal forces, and selecting appropriate components. Mastery of these elements will dramatically reduce the incidence of screw loosening and fracture.
Achieving Optimal Preload
Preload is the tension created within a screw upon tightening, which generates the clamping force that secures the abutment to the implant. Insufficient preload permits micro-movements during function, making eventual loosening inevitable. Therefore, the use of a calibrated torque wrench is non-negotiable.
- Ensure Calibration: Torque wrenches lose accuracy over time and require regular calibration according to manufacturer guidelines to ensure predictable outcomes.
- Adhere to Specifications: Each implant system has a specific recommended torque value for its screws. This value must be strictly followed.
Research indicates that optimal preload is achieved at 60% to 70% of the screw's yield strength, which maintains joint integrity and resists fatigue fractures. Contamination within the implant connection can increase frictional stress by up to 9.5%, compromising the final preload. A relevant study on this topic can be found at Nature.com.
Managing Occlusal Forces
A perfectly torqued screw can still fail if subjected to excessive or off-axis occlusal forces. A comprehensive occlusal analysis and adjustment are integral to the restorative process. The objective is to create a balanced scheme that directs forces along the implant's long axis.
Heavy eccentric contacts on the implant-supported crown must be identified and eliminated, as these lateral forces create significant bending moments and stress on the screw. For patients with parafunctional habits, a protective occlusal guard is essential for long-term stability. For a detailed analysis, read our article on the parameters that determine micromotion at the implant-abutment interface.
A well-balanced occlusal scheme is as critical as the torque applied to the screw. The clinical goal is a restoration that is not only esthetic but also biomechanically stable for the long term.
Intelligent Component and Prosthesis Design
The selection of the implant system and prosthetic components is critical. Systems featuring robust, precision-milled connections provide superior stability and resistance to the forces that cause screw loosening.
For example, a system with a deep conical connection, such as the ARC™ Conical Implant from Alfa Gate, offers exceptional stability and a superior seal. This design effectively distributes occlusal loads through the implant body, reducing stress on the abutment screw. Furthermore, ensuring a passive fit of the final prosthesis is paramount. Any misfit introduces internal stress, predisposing the restoration to mechanical failure.
By integrating these strategies—precise torque, meticulous occlusal management, and intelligent component selection—clinicians can significantly enhance the longevity and success of their implant restorations.
Common Questions About Implant Screw Removal
Several key questions arise when managing a complicated implant screw removal. The following provides clear, practical answers to common clinical dilemmas encountered during an implantat schraube entfernen procedure.
When Is It Better to Refer a Fractured Screw Case?
Knowing when to refer a case to a specialist is a critical aspect of clinical judgment. Referral is the most prudent course of action in several scenarios to protect the implant's long-term health.
If a screw has fractured deep within the implant body, the risk of damaging the internal threads during retrieval is high. Similarly, attempting retrieval without the specific kit designed for that implant system is ill-advised. Improvising with incorrect tools can lead to irreversible damage.
Referral is not an admission of failure—it's an act of clinical prudence. Protecting those delicate internal threads is everything, and a specialist often has the advanced gear and experience to handle the toughest cases.
If initial, careful attempts are unsuccessful, it is wise to stop. Continuing risks turning a salvageable implant into a failure. If radiographs suggest pre-existing thread damage or if a direct line of sight to the fragment cannot be achieved, referral to a prosthodontist or oral surgeon is the appropriate action.
Can I Reuse an Abutment Screw After Retightening It?
No. An abutment screw should never be reused once it has been torqued and subsequently removed, regardless of its visual appearance.
When a screw is tightened to the recommended torque, it undergoes slight elastic deformation. This stretch is what creates the "preload"—the clamping force essential for abutment stability. Once a screw has been subjected to this tensile load, its mechanical properties are altered.
Reusing the screw significantly increases its susceptibility to fatigue, loosening at a lower force, and eventual fracture. Always use a new, sterile screw from the manufacturer for the final restoration. The minimal cost of a new screw is negligible compared to the clinical complications of a future failure. You can explore a full range of reliable components within the Alfa Gate prosthetic solutions.
What Is the Most Common Cause of Screw Loosening?
The primary cause of abutment screw loosening is inadequate preload. This typically results from under-torquing the screw during placement.
This critical error often occurs for one of two reasons:
- Using a non-calibrated torque wrench: Torque instruments require regular calibration as per manufacturer guidelines to maintain accuracy. An uncalibrated wrench provides a false sense of security and can result in insufficient preload.
- Not following manufacturer specifications: Every implant system has a specific torque value for its screws. Applying a generic torque value is a significant clinical error.
The other major contributing factor is occlusal overload. Even a correctly torqued screw will eventually fail under excessive or off-axis occlusal forces. Therefore, meticulous occlusal analysis and adjustment are a non-negotiable part of the restorative protocol. For a comprehensive review of this topic, our article on the parameters determining micromotion is an excellent resource.
Are you looking to partner with a company that prioritises clinical excellence and provides reliable, innovative implant solutions? Alfa Gate is dedicated to supporting dental professionals worldwide. To learn more about our products or partnership opportunities, become a distributor and join our global network.