


A Clinician's Guide to Multi Unit Abutments
For full-arch restorations, multi-unit abutments are indispensable components. They serve as the critical connectors for any screw-retained, multi-implant case, particularly in complex treatments like the All-on-X protocol where implant placement is often dictated by the patient's existing bone volume and anatomy. This guide offers actionable insights for dental professionals on their clinical application.
The Foundation of Full-Arch Restorations
For any full-arch prosthesis to achieve long-term success, a passive fit is non-negotiable. Multi-unit abutments (MUAs) function as precision-engineered connectors that support the prosthesis. Their primary role is to establish a level and stable restorative platform, regardless of underlying discrepancies in the jawbone.
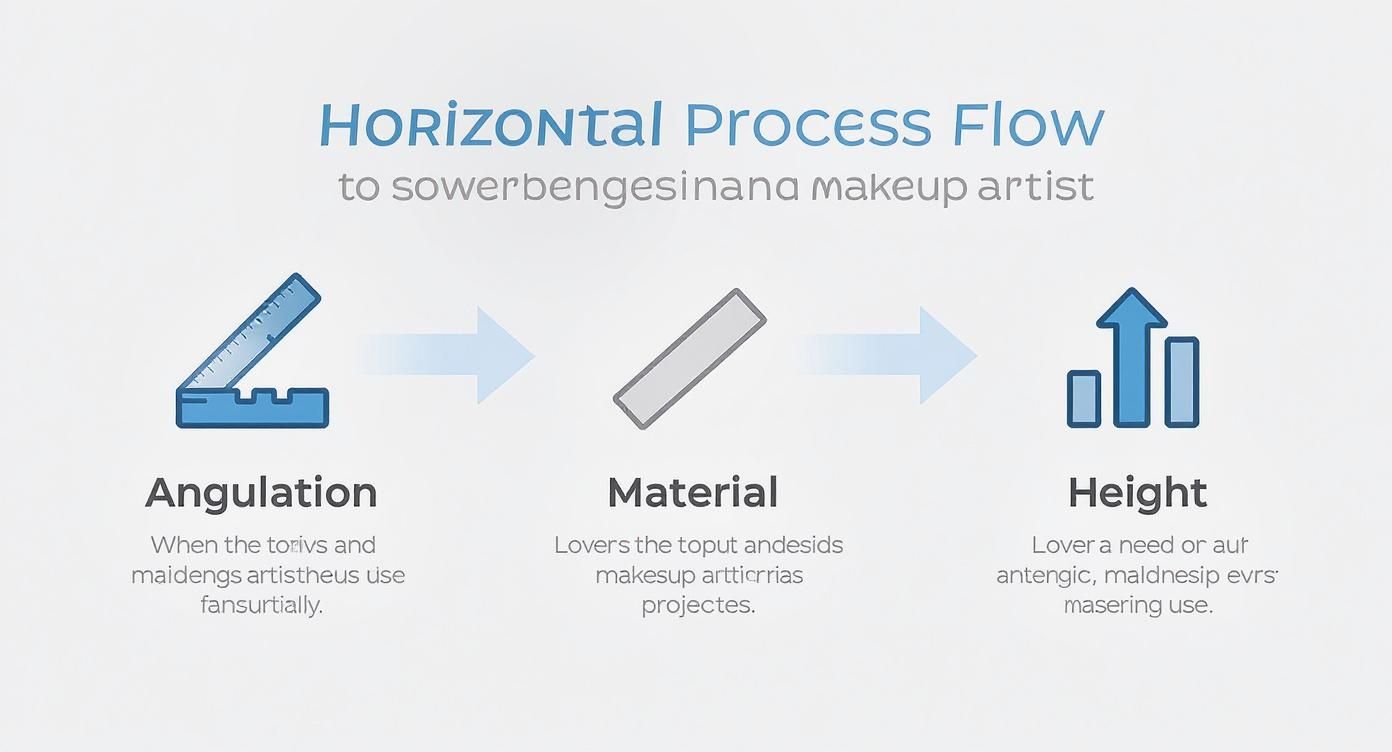
A key function of MUAs is to correct for variations in implant angulation. In clinical practice, implants are often placed where bone quality and quantity are most favorable, which may not align with the ideal path of insertion for the final restoration. By correcting these angles, MUAs create a common path of insertion, which is crucial for a passive fit. This design eliminates undue stress on the implants and the prosthetic framework, mitigating risks such as screw loosening and other biological or mechanical complications.
Why MUAs are Indispensable in Implant Dentistry
Beyond angle correction, multi-unit abutments effectively transition the restorative platform from the implant level up to the tissue level. This shift provides several significant clinical advantages, streamlining the restorative process and promoting better long-term outcomes.
We have summarized the key benefits of using MUAs in complex restorative cases below.
Key Clinical Advantages of Multi Unit Abutments
| Clinical Advantage | Description and Clinical Impact |
|---|---|
| Improved Accessibility | The elevated platform simplifies impression-taking, digital scanning, and the final prosthesis delivery, enhancing clinical efficiency and patient comfort. |
| Enhanced Soft Tissue Health | Raising the connection point keeps the prosthetic margin away from the sensitive bone-implant interface, which facilitates better soft tissue management and hygiene. |
| Simplified Maintenance | If the prosthesis needs to be removed for cleaning or repairs, the process is less invasive and quicker due to the accessible, tissue-level connections. |
Mastering the use of multi-unit abutments is essential for any clinician engaged in advanced implant dentistry. They are fundamental to achieving predictable, aesthetic, and durable outcomes for patients.
The growing demand for these solutions is clear. Market analysis shows that the European dental implants market continues to expand, with Germany alone representing approximately 27.4% of the total market share. This growth is driven by factors such as a high dentist-to-population ratio and insurance policies that often support implant treatments.
Understanding the application of MUAs in established full-arch protocols is vital. For clinicians performing these advanced procedures, exploring specific treatments provides practical insights. You can learn more about how MUAs are used in clinical scenarios by reading our detailed guide on All-on-4® dental implants.
Determining the appropriate use of a multi-unit abutment (MUA) is critical for achieving an optimal restorative outcome. These are not universal components but rather specific tools for defined clinical situations. Correct application ensures predictable and successful results.
The primary indication for MUAs is in full-arch, screw-retained prostheses, such as All-on-4 or All-on-6 cases, where an entire arch is supported by a limited number of implants. In these scenarios, MUAs create a common path of insertion and a level restorative platform. This ensures the final prosthesis seats passively, without introducing stress to the implants or the framework—a critical factor for the long-term health and success of the restoration.
Correcting Implant Angulation
Another significant advantage of MUAs is their ability to correct for angulated implants. It is common practice to tilt implants to bypass anatomical structures, such as the maxillary sinus or inferior alveolar nerve, or simply to engage better quality bone.
Multi-unit abutments are engineered to correct implant angulations of up to 30 degrees. By selecting the appropriate angled MUA—such as a 17° or 30° version—a clinician can transform a field of divergent implants into a parallel foundation for the prosthesis, simplifying all subsequent restorative steps.
A classic example is an All-on-4 case, where posterior implants are often tilted distally to maximize bone engagement and A-P spread. Applying a 30° MUA to these implants repositions the screw access holes to a more favorable occlusal location, improving both aesthetics and function. For clinicians looking to enhance their skills in these cases, educational material on abutment and screw mechanics offers deeper insights.
Managing Limited Restorative Space
MUAs are also beneficial in cases with limited interocclusal space. They effectively raise the connection point from the implant level to just above the gingival margin. This shift reduces the vertical height required for the prosthetic components and framework. This is advantageous for patients with limited vertical dimension, allowing for the fabrication of a strong, streamlined restoration without compromising material thickness. The design also facilitates easier patient hygiene. You can explore a full range of prosthetic components, including low-profile MUAs, in the Alfa Gate product catalogue.
When Not to Use Multi Unit Abutments
Conversely, there are clinical situations where an MUA is contraindicated. They are specifically designed to splint multiple implants together, making them unsuitable for single-implant restorations. Using an MUA for a single crown unnecessarily complicates the restorative process.
They also have limitations in cases with severely limited interocclusal space, where even the shortest abutment and coping combination will not fit. In such scenarios, a cement-retained crown or a direct implant-level restoration may be a more appropriate choice.
By carefully evaluating these factors, clinicians can confidently determine when multi-unit abutments will contribute to a predictable and successful clinical outcome. If you have questions about a specific case, please contact our team of experts.
Choosing the Right Type of MUA
Selecting the appropriate multi-unit abutment is a critical decision that influences the entire restorative outcome for a full-arch case. This choice directly impacts the final fit, function, and aesthetics of the prosthesis. A thorough understanding of the available options—from angulation and material to collar height—is essential for supporting healthy soft tissue and ensuring a passive fit.
The first major decision is whether to use a straight or an angulated MUA. Each is designed for a specific purpose, and correct selection is key to creating a passive path of insertion, especially when implants are not perfectly parallel.
Straight vs Angulated MUAs
A straight multi-unit abutment is the standard choice when an implant is placed in an ideal vertical position, perfectly aligned with the restorative path of insertion. It provides a direct connection between the implant and the final prosthesis, representing the most straightforward restorative approach.
However, ideal implant placement is not always achievable. This is where angulated multi-unit abutments become essential. When bone anatomy necessitates tilting an implant, an angulated MUA corrects the trajectory. Alfa Gate offers options such as 17° and 30° abutments that redirect the screw access channel into a more favorable occlusal or lingual position. This correction prevents aesthetic compromises and simplifies future access to the restoration.
Consider a typical All-on-X case where the posterior implants are often tilted to avoid the maxillary sinus and engage more bone. A 30° MUA on those implants levels the restorative platform, creating a common path of insertion that makes every subsequent step—from impression to final delivery—far more predictable.
This table provides a quick reference for selecting the appropriate MUA type.
Comparing Straight and Angulated Multi Unit Abutments
| Abutment Type | Primary Indication | Angulation Correction | Common Clinical Scenario |
|---|---|---|---|
| Straight | Ideally placed, parallel implants | None | Anterior implants or posterior implants placed in abundant, parallel bone. |
| Angulated | Divergent or tilted implants | Corrects angles up to 30° | Tilted posterior implants in All-on-X cases to avoid sinuses or nerves. |
Having both straight and angulated options provides the clinical flexibility needed to manage diverse anatomical situations and ensure a predictable outcome.
Material and Connection Integrity
Titanium remains the material of choice for multi-unit abutments due to its high strength, low weight, and proven track record of biocompatibility. It ensures long-term stability without causing adverse tissue reactions. This preference is reflected in market trends.
The European multi-unit abutment market was valued at USD 0.44 billion and is projected to grow, driven by an aging population and the increasing adoption of advanced implant solutions. You can find more details in these dental abutment market trends on fortunebusinessinsights.com.
Equally important is the abutment's connection type. A precisely engineered fit between the implant and the MUA is necessary to eliminate micromovement and create a stable, sealed foundation. The connection must be compatible with the implant system to distribute occlusal forces evenly, protecting both the implant and the surrounding bone. To guarantee a perfect fit, it is essential to use prosthetic components designed for your specific system, such as those available for Alfa Gate’s implant systems.
Selecting the Correct Collar Height
The final consideration is selecting the appropriate collar height (or gingival height). This dimension represents the distance from the implant platform to the abutment's restorative margin and must be matched to the patient’s soft tissue thickness.
Proper collar height selection is critical for two primary reasons:
- Promoting Soft Tissue Health: A correctly sized collar places the prosthetic margin at or just slightly below the gingival crest. This prevents impingement on the soft tissue, facilitates oral hygiene, and reduces the risk of peri-implant inflammation.
- Achieving a Natural Emergence Profile: The collar helps shape the gingival tissue to create a smooth, natural-looking transition from the implant to the prosthesis. This is essential for achieving an aesthetic outcome where the restoration appears to emerge naturally from the gums.
By systematically considering implant angulation, material integrity, and tissue depth, clinicians can confidently select the ideal multi-unit abutment. This attention to detail establishes the foundation for a successful, long-lasting, and aesthetic full-arch restoration. For guidance on selecting components, you can Become a distributor to learn more about our complete implant solutions.
Mastering the Restorative Workflow
Restoring a full arch with multi-unit abutments requires a precise, step-by-step methodology. Whether using a traditional analogue workflow or a modern digital pathway, the primary objectives remain the same: achieving a perfectly passive fit, ensuring long-term stability, and delivering a functional and aesthetic prosthesis.
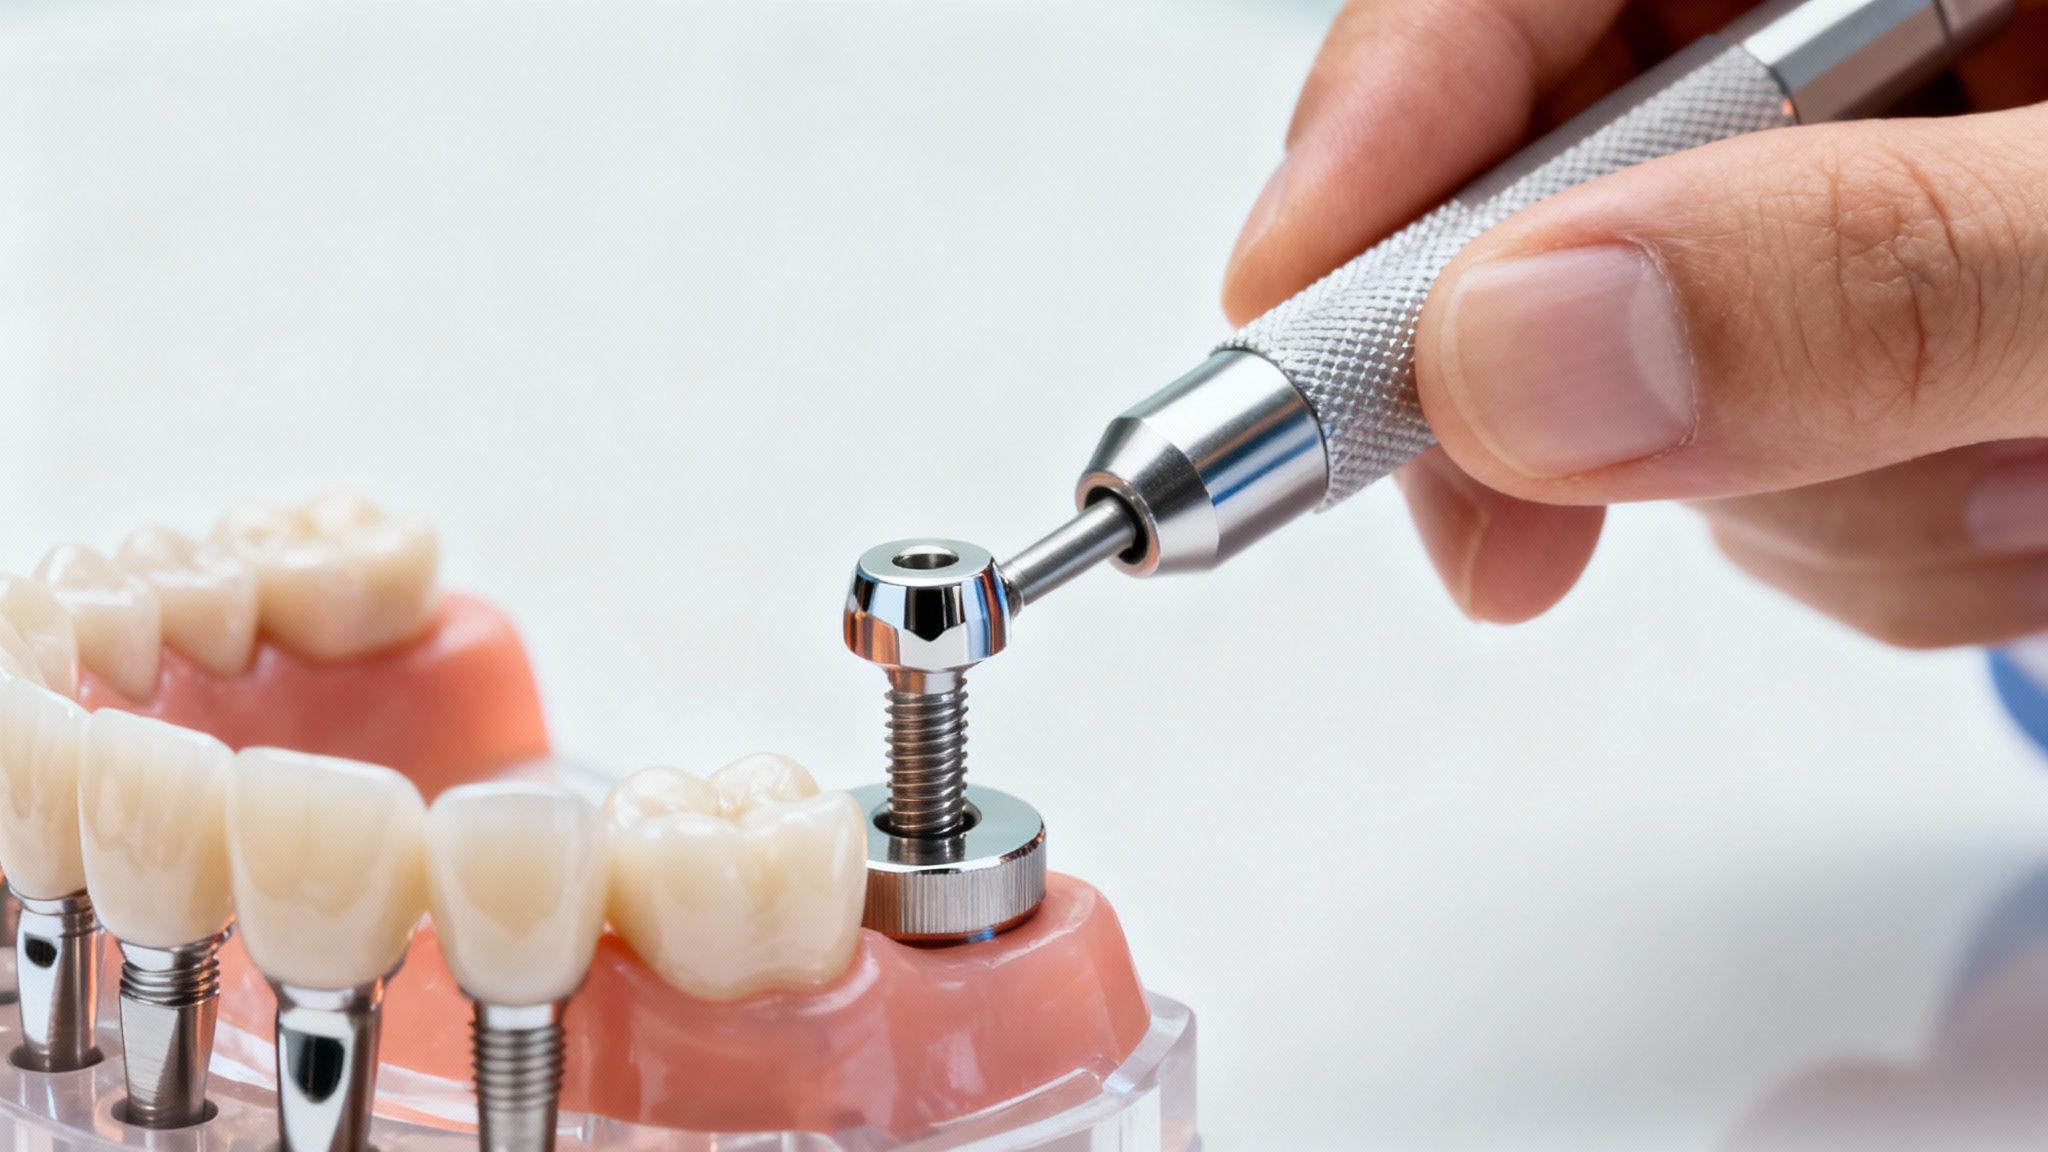
The process begins with the correct placement of the abutments. After the implants are uncovered, each multi-unit abutment is seated and torqued to the manufacturer’s specified value. This step is foundational; an improperly seated abutment will compromise the entire restoration. Following placement, radiographic verification of the abutment-implant interface is mandatory to confirm a complete, gap-free connection.
The Analogue Workflow in Detail
The conventional analogue workflow, relying on physical impressions and stone models, remains a highly reliable method for achieving excellent outcomes when executed correctly.
-
The Verification Jig: Before the final impression, a verification jig is fabricated. This rigid framework, typically made from pattern resin, connects all impression copings intraorally. The jig must seat completely passively, without any rocking or resistance, to confirm that the spatial relationship between the implants has been accurately captured.
-
The Open-Tray Impression: For full-arch cases, an open-tray impression is the standard of care. The impression copings should be splinted together in the mouth—using dental floss and flowable composite—to form a single rigid unit. This prevents micromovement during the impression procedure, ensuring the laboratory receives an accurate record of the implant positions.
-
Delivering the Final Prosthesis: After laboratory fabrication, the prosthesis is tried in. The fit is checked visually and confirmed radiographically before the final prosthetic screws are torqued. These screws are typically tightened to a lower value, often around 15 Ncm, to secure the prosthesis to the abutments.
This infographic outlines the critical decisions made at the start of either workflow.
This decision tree helps clinicians quickly select the appropriate abutment based on angulation correction needs, material choice, and cuff height from the outset of treatment planning.
Embracing the Digital Pathway
The digital workflow replaces conventional impression materials with intraoral scans, improving efficiency and patient comfort. However, it presents unique challenges. Achieving accuracy across a long-span arch requires meticulous technique and a thorough understanding of digital scanning principles.
The precision of the scan directly determines the passive fit of the final prosthesis. Even minor scanning errors can be magnified during the design and milling phases, resulting in a prosthesis that does not seat properly and introduces harmful stress to the implants.
One effective technique to improve full-arch digital impression accuracy is to use a verification jig or a splinting material during the scan. This provides the software with additional physical reference points, helping it accurately "stitch" the individual scan images into a single, distortion-free 3D model.
Key Steps in the Digital Workflow
The digital workflow shifts much of the process from the dental laboratory bench to the computer.
- Scanning with Scan Bodies: MUA-specific scan bodies are attached to each abutment. A comprehensive scan is then performed, capturing the scan bodies, gingival contours, and the patient's occlusion.
- CAD Design: The scan data is imported into design software (CAD), where a technician designs the prosthetic framework and final restoration. This phase allows for virtual refinement of contours, occlusion, and aesthetics.
- CAM Fabrication: The finalized design is sent to a high-precision milling machine or 3D printer for fabrication (CAM). The framework is typically milled from materials like titanium or zirconia.
Regardless of the chosen workflow, a framework try-in before the application of porcelain or acrylic is a critical verification step. This allows for the identification of any inaccuracies, saving significant chair time and laboratory costs.
A reliable digital process starts with high-quality data capture. Tools like Alfa Gate's precision-engineered scan posts for multi unit abutments are designed to capture implant positions with exacting accuracy, providing the foundation for a successful digital case.
Troubleshooting Common MUA Complications
Even with careful planning, complications can arise in full-arch restorative cases. When working with multi-unit abutments, issues may range from a minor misfit of the prosthesis to soft tissue inflammation. Clinical skill is demonstrated not only in implant placement but also in effectively managing these challenges. Promptly addressing problems is key to patient satisfaction and the long-term success of the restoration.
What to Do When the Prosthesis Doesn't Fit
A full-arch prosthesis that does not seat passively is a significant clinical problem. A non-passive fit introduces stress into the system, which can lead to screw loosening, component fracture, or biological complications. The source of the error can usually be traced back to the restorative workflow.
- Analogue Impressions: Minor distortions in the impression material or a slight shift of an impression coping can render the master cast inaccurate.
- Digital Scans: Long-span intraoral scans are technique-sensitive. Imperfect software stitching or inaccurate capture of scan body geometry can result in a distorted digital model.
- Lab Fabrication: Errors can also occur during the milling or casting of the framework, leading to inaccuracies independent of the clinical procedures.
A misfit can be diagnosed using a verification jig or a 3D-printed resin try-in. If the jig must be sectioned to seat passively on individual MUAs, it confirms that the master model is inaccurate.
A non-passive fit is an absolute contraindication for final placement. Never attempt to force a prosthesis to seat, as this will transfer damaging forces to the implants and surrounding bone. The correct protocol is to repeat the impression or scan to achieve a stress-free result.
Solving the Mystery of the Loose Screw
A recurring loose prosthetic screw is a symptom of an underlying problem. While it appears to be a simple mechanical failure, it typically indicates either an ill-fitting framework or incorrect torque application.
A prosthesis that does not fit passively will exhibit micromovement during function. These movements place cyclical, off-axis loads on the screws, which is a primary cause of screw loosening. Therefore, the first step is always to verify the passive fit of the framework.
The second factor is torque. Every screw requires a specific amount of preload—the clamping force that secures the components—which is achieved by tightening it to the manufacturer's recommended torque value.
- Under-torquing: Insufficient torque fails to achieve the necessary preload, making screw loosening highly likely.
- Over-torquing: Excessive torque can stretch the screw beyond its elastic limit or damage the abutment, increasing the risk of fracture.
Always use a calibrated torque wrench and adhere to the recommended values. For a detailed explanation of these principles, our guide on the importance of the abutment screw is an excellent resource.
Maintaining Healthy Soft Tissues
A key benefit of multi-unit abutments is that the connection is supragingival, which is favorable for soft tissue health. However, issues like inflammation or tissue overgrowth can still occur, usually due to inadequate oral hygiene or a poorly designed prosthesis.
If mucositis is observed, the cause is typically plaque accumulation around the abutment or under the prosthesis. This points to a design flaw. The final restoration must be designed to be cleansable by the patient. A smooth, convex intaglio surface is essential to allow for effective cleaning with tools like water flossers or interdental brushes.
If tissue hypertrophy occurs, the prosthesis may be over-contoured or impinging on the gingiva. Reshaping the prosthetic contours to create a more natural emergence profile can often resolve the issue. If you need assistance with a challenging case, please contact our clinical support team for expert advice.
A Closer Look at the Alfa Gate MUA System
Successful clinical outcomes are built on a foundation of sound scientific principles and reliable components. The Alfa Gate Multi-Unit Abutment (MUA) system is engineered to provide the precision required for predictable, long-lasting full-arch restorations. Our system is designed around tight manufacturing tolerances and seamless integration. Every MUA connects perfectly with our implant lines, creating a secure, stable, and sealed joint at the implant level. This precision fit minimizes micromovement, which is critical for protecting the long-term health of the peri-implant bone.
Built for Real-World Clinical Needs
Because every patient's anatomy is unique, a versatile prosthetic system is essential. The Alfa Gate MUA portfolio is designed to provide clinicians with a comprehensive toolkit to address a wide range of clinical challenges.
- Correcting for Angulation: We offer straight MUAs for ideally positioned implants, along with 17° and 30° angulated versions. These are crucial for correcting divergent implant paths and achieving a passive, stress-free fit for the final prosthesis.
- Managing Soft Tissue: A wide range of collar heights allows for precise matching to the patient's gingival thickness. This facilitates the creation of healthy soft tissue contours and an aesthetic emergence profile.
- Streamlined Compatibility: Our MUAs are compatible across various Alfa Gate implant platforms, simplifying inventory management and component selection.
A well-designed implant system provides clinical confidence. Knowing that every component is engineered to work in harmony—from the implant to the final prosthetic screw—eliminates guesswork and allows the clinician to focus on patient care.
How to Select and Order Alfa Gate Components
We have streamlined the process of finding the right components for your case. The Alfa Gate product catalogue is organized logically, allowing you to quickly identify the exact MUA needed based on implant type, angulation, and gingival height.
For clinicians planning complex treatments, we offer a complete solution. We provide everything from the abutments themselves to scan bodies for digital workflows, as well as all necessary final screws and laboratory components. This ensures a smooth and efficient process from treatment planning to final delivery.
Explore our full range of Multi-Unit Abutments and prosthetic components to see how our system can support your clinical work.
If you have questions about a specific case or require a second opinion on component selection, our expert team is available to assist. Contact us today to learn more about incorporating the reliability of the Alfa Gate MUA system into your practice.
Your MUA Questions, Answered
Here are concise, practical answers to some of the most frequently asked questions about multi-unit abutments.
How Do You Pick the Right Gingival Height for a Multi-Unit Abutment?
The correct gingival (or collar) height is determined by the soft tissue depth. Measure the peri-implant sulcus from the implant platform to the crest of the gingiva using a periodontal probe. The goal is to select a multi-unit abutment with a collar height that places the prosthetic margin at the tissue level or just slightly subgingivally (0.5-1.0 mm). This creates a clean emergence profile and facilitates patient hygiene.
What’s the Difference Between Engaging and Non-Engaging Connections?
This distinction relates to how an abutment interacts with the implant's anti-rotational feature, typically a hexagon. An engaging connection fits into the implant hex, locking it in place and preventing rotation. This is essential for single-implant, cement-retained crowns to ensure rotational stability.
Non-engaging connections do not engage the hex and can rotate freely. Multi-unit abutments are always non-engaging by design. For a full-arch prosthesis splinting multiple implants, this rotational freedom is necessary to achieve a passive fit across the entire framework. For more details, see our article on abutment and screw mechanics.
Can You Use Multi-Unit Abutments for Removable Overdentures?
While theoretically possible, it is not recommended as MUAs are not designed for this purpose. They are engineered specifically for fixed, screw-retained prostheses. For removable solutions, dedicated attachments like locators or ball abutments are the appropriate choice. These components are designed to provide the retention and resiliency required for a functional overdenture. You can view the full range of options for fixed restorations in the Alfa Gate product catalogue.
What Are the Best Practices for Maintaining a Prosthesis on MUAs?
Long-term success depends on a partnership between the clinician and the patient, involving excellent home care and consistent professional maintenance.
The design of the prosthesis is critical. The intaglio surface (the tissue-facing side) must be cleansable. It should be convex, smooth, and provide adequate space for the patient to use tools like water flossers and interdental brushes effectively.
Professionally, periodic removal of the prosthesis should be scheduled. This allows for thorough cleaning of the components, inspection for wear, and assessment of soft tissue health. These regular maintenance appointments are the best way to ensure the long-term stability and health of the restoration.
For personalized advice on your complex restorative cases or to learn how Alfa Gate can support your practice, we invite you to connect with us. You can become a distributor or contact our team of clinical experts today to explore our innovative implant solutions.